

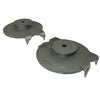
Rear TJ coil Perches and retainers (pair)
SKU : BR1045
Regular price
$109.99
$93.49
Rear TJ coil Perches and retainers (pair)

- 1/4" steel
- Clockable to any angle for larger lifts
- CNC laser cut and CNC bent for precise fit
- Engineered using 3D scan files
- Made for off-road use
- Made in the USA
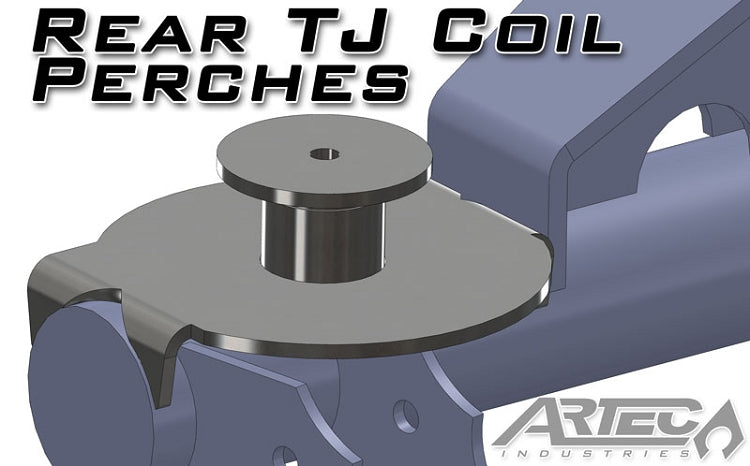
Complete your ultimate off-road build with Artec Industires’ Rear Coil Spring Mounts for your vehicle. These mounts perfectly locate your rear coil springs in the factory location for a hassle-free, measure-free swap when used with our rear Axle truss. Our kit includes bottom perches, tubing spacers, flat tube caps, spring retainers, and ½" retainer hardware for both sides of the Axle. Plus, a larger front side and laser-etched guide allow you to locate your spring 1 inch forward for a wheelbase stretch.
Reviews
Install Instructions
This Kit requires Welding and Fabrication skills,
If you are not confident in your abilities please have this product installed
at an Off-road shop.
Tools Required :
Safety Glasses, Jack, Jack Stands, Socket Set, Wrench set,
framing square(X2), Tape measure, drift punch, Hammer Angle finder, Welder, Welding PPE, Cutting tools
(Example Sawzall, Grinder, Cutting Torch, Plasma cutter)
Step 1:
Chock the front wheels of the vehicle.
Break the rear lug nuts free
(Do not completely remove the lug
nuts.)
Jack up rear of the vehicle and set the frame securely on jack
stands. Keep the Jack under the axle
(You'll need to us this to help
control the axle dropping later on.)
Remove lug nuts and wheels from vehicle.
Unbolt the shocks, rear track bar, Sway bar end links, and
rear driveshaft from the axle housing.
Use the jack to slowly lower the axle down the coil springs
should be able to be pulled out easily
(Keep an eye on the rear brake line
make sure it does not get tight or stretch.)
Use an angle finder to check the angle of you current spring
plates. (Record
this number for later on)
Hold a framing square on the center of the coil spring perches
and take a measurement from center to center (Record this number for later also)
Now cut off the current spring plates from the axle and
grind the area smooth to prep for welding.
Install the coil plate,
Use the center to center measurement you took in step 7 to position the
coil plates , Now using the angle finder place it on top of the coil plate and tilt
the coil plates to get the angle you had recorded in step 7. Then Weld the coil mounts into place.
(The coil plate is offset towards
the front of the vehicle, So make sure the larger part of the plate hangs over
the front of the axle. )
Weld the center tubes to the coil bucket (make sure they are flush
with the bottom of the coil bucket when welding into place.) Tack
weld the supplied bolt from the HK0050 kit to the bottom of the small round
disk. Weld the Small disk on top of the
round tube (with bolt threads facing up) The big disk will be used in next step
.
Paint the coil brackets with some self-etching primer and
paint (We find we get the best results with rustolem paint.)
Insert the coil springs onto coil plates, Now slip the large disk inside of coil and
have the bolt from the small tube slip through the hole. Use the nylock nut from the HK0050 kit to
tighten the round disk. Once this is done
you can raise the axle up into position with the jack.
Install the shocks, Sway bar links , Track bar and drive
shaft onto rear axle. Tighten the bolts finger tight .
(You may need to use a drift punch
to help getting bolts aligned when reinstalling the track bar and shock bolts)
Install the wheels and tighten the lug nuts (do not torque them yet)
Raise the Vehicle up off the jack stands with the jack, Remove
the Jack stands and lower vehicle onto the ground .
Torque shock bolts and track bar bolts to 75ftlbs and sway bar link bolts to 40ftlbs Then lug nuts
to 95ft lbs. and U-joint strap bolts to 17ftlbs

Community Discussion