
TJ 8.8 Swap kit OEM Sway Bar Brackets (Pair)
SKU : TJ8802
Regular price
$43.99
$37.39
TJ 8.8 Swap kit OEM Sway Bar Brackets (Pair)

- Made from 1/4" thick boxed steel plate for strength
- Cut for 3.25" diameter axle tubes on the 8.8 axle
- Intended for use with factory TJ sway bar
- Compatible with other axles with minor modifications
- Provides a custom, one-off look with unique style
- No more brackets that look like modified angle iron or c-channel, but rather formed pieces of artwork to show off.
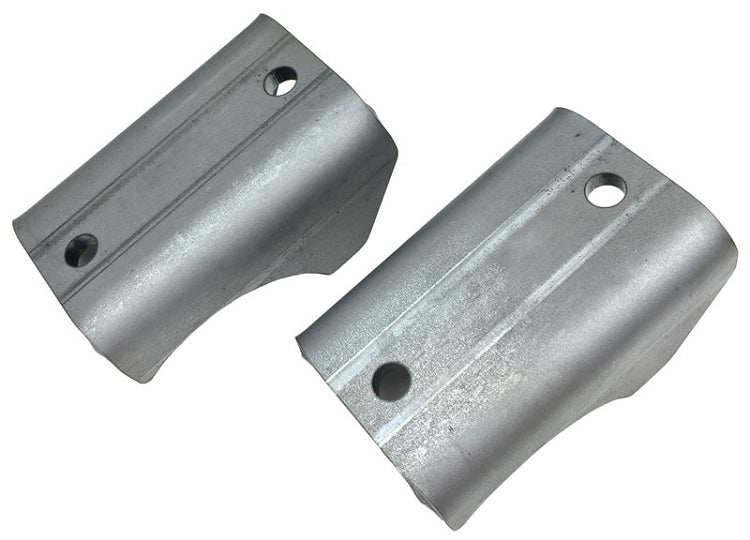
Artec Industries is now offering the same sway bar brackets from our popular TJ 8.8 swap kit. Made from 1/4" thick boxed steel plate, these brackets are designed for strength and cut for 3.25" diameter axle tubes on the 8.8 axle. Although may be used on other axles with minor modifications, they are intended for use with the factory TJ sway bar. These brackets provide a custom, one-off look with their unique style - no more brackets that look like modified angle iron or c-channel, but rather formed pieces of artwork to show off.NOTE: This part requires general welding and fabrication skills. Welding should only be done by a competent welder. Artec Industries implies no guarantees or warranties and is not liable for improper installation.
Reviews
Install Instructions
Installation of this product requires fabrication and welding skills. If you are not confident of your abilities
please have this installed at an off road shop.
Tools required : Socket Set,
Jack, Jack stands, Cutting tool (example: Cut off wheel, sawzall, Plasma
cutter) Welder, Angle finder
Step 1:
Make sure you have
all the correct parts. If you are missing parts of have incorrect parts Contact
Artec Industries Immediately at (855) 278-3299 M-F 8:30am-5pm MST.
Step 2:
Place Wheel chocks at the front wheels and lift the rear of
the vehicle with a jack . Place jack
stands under the rear axle and lower jeep securly onto the jack stands.
Step 3:
Remove the rear sway bar from the vehicle.
Step 4:
With the sway bar removed from the vehicle, Use an angle finder to measure the angle of
the mount. Record that number for
later.
Step 5:
Use your cutting tool of choice to remove the existing sway
bar mounts, Clean and prep the area for
welding with a wire wheel or flap disk.
Step 6:
Place sway bar mounts
between the differential and rear coil spring mounts. You should have 5-3/4" between the center of
the coil spring mount and center of the sway bar mount. Use your angle to match
the angle of the original mount and weld into position. Repeat this step on the opposite side.
Step 7:
Prime and paint the sway bar brackets and axle tubes where
you cleaned for welding (We found rustolem products gave us the best results)
Step 8:
Reinstall the rear sway bar onto the vehicle and torque
bolts to 40ftlbs.
Step 9:
Raise vehicle off of the jack stands and remove them from
under the vehicle. Lower vehicle back onto the ground.
Step 10:
Congratulations now you are done.

Community Discussion