

JK Front LCA Skids
SKU : JK4404
Regular price
$54.99
$46.74
JK Front LCA Skids

- Integrated skid plate
- Joint protection from direct impact
- Decreases premature wear on joint
- Designed to not interfere with joint movement
- Secured to axle better than OEM so it doesn’t rip off
- 1/4" thick steel
- Boxed plate for strength and impact resistance
- Sold in a pair
Off-roading is all about adventure, but bent and mangled factory lower control arm brackets can quickly spoil the fun. Artec’s Heavy Duty Brackets provide a reliable replacement that ensures you’ll never have to worry about bracket damage again. Unlike standard factory brackets, ours are specifically designed to improve functionality. Enjoy the thrill of the off-road without worrying about equipment failure.
Reviews
Install Instructions
The installation
of this product Requires Welding, Fabrication, and Mechanical skills. If you
are not confident in your abilities Please have this product installed at an
Off-road Shop.
Tools Required:
Safety glasses, socket set, wrenches, torque wrench, Needle
nose Pliers, Drift Punch set, tie rod separator, ball joint separator, Bungee
cords, Ball joint press, grinder or wire wheel, Welder, Welding PPE, Jack, Tall Jack stands.
Step 1:
Inventory all parts to ensure you have all of the correct
pieces. If you
are missing parts Contact Artec Industries Immediately at (855) 278-3299 M-F 8:30-5pm MST If outside of those hours Email
us at Sales@Artecindustries.com (Please include picture of part number label on
box as well as your invoice number)
Step 2:
Break free the lug nuts on the front of the Jeep (Do not completely loosen or remove the lugnuts!)
Place wheel chocks at the rear wheels of the vehicle. Jack up the front of the Jeep as high as you
can place the jack stands securely under the frame of the Jeep and under the
axle. Now lower the jack.
Step 3:
Remove lug nuts and the front wheels to provide more working
space.
Step 4:
Removed lower control arms from the axle. With the lower control arm removed use a grinder
or wire wheel to clean the surface of the LCA mounts to remove any paint, rust,
or debris to ensure it is ready for
welding .
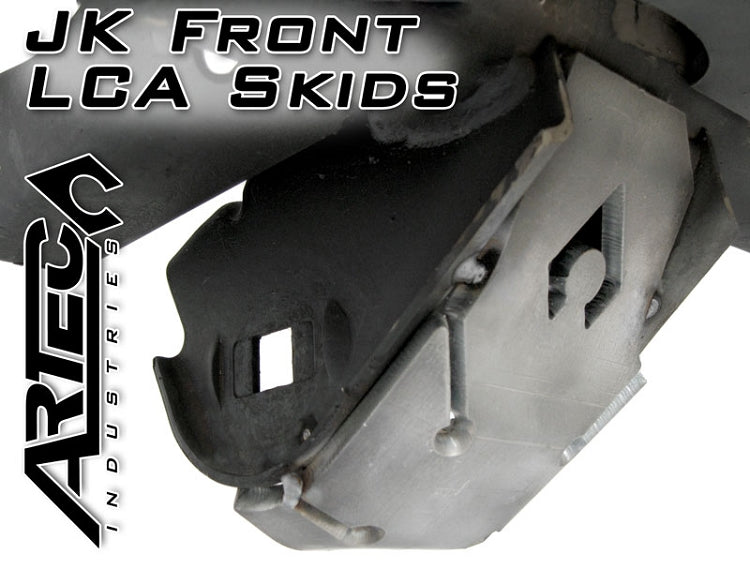
Step 5:
Place the Control arm skids on the LCA bracket and weld them
into place . (See Image #2 for reference of how they
fit into the LCA bracket ) Weld the
open seam on the LCA skid and leave the
little round holes open for Mud and water to drain from.
(Control Arm Skid orientation : The
JK4404-1 is for the driver side the
JK4404-2 is for the passenger side.)
Step 6:
Clean brackets from any machining oil from the manufacturing
process and Paint brackets with a self-etching primer and paint.
Step 7:
Reinstall the Lower control arms.
Step 8:
Install tires and lug nuts (Do not
fully tighten lug nuts)
Step 9
Use a Jack to raise the Jeep off of the Jack stands and
remove them from under the vehicle then lower the Jack. Torque Lug nuts and LCA brackets to Manufacturers
Spec.
After 50 Miles torque all bolts to their
proper specs.

Community Discussion