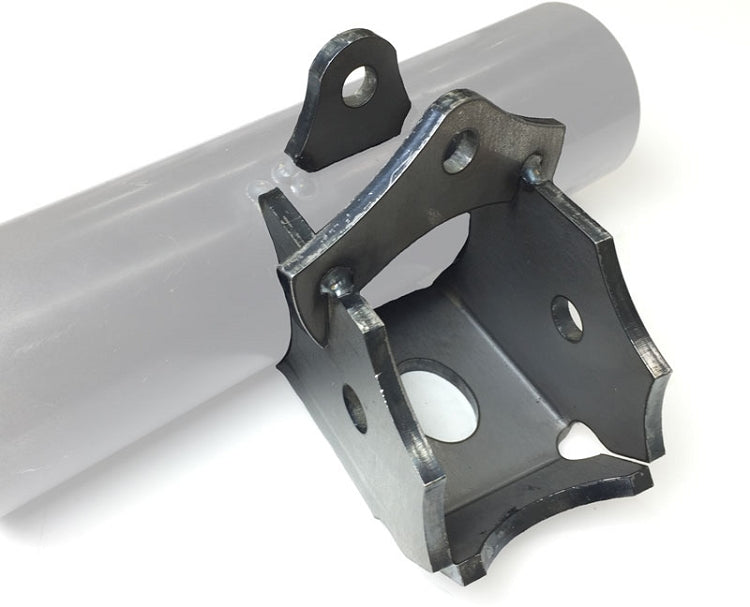
Shock + Lower Link Axle Combo Brackets (pair)

- ¼" thick boxed steel plate for strength and impact resistance
- 2.625” mounting width with a 9/16” bolt hole
- Top access grease fitting for easy maintenance
- Skid plate protects joint from impact and decreases wear for longer life
- Skid plate design does not restrict joint movement
- Unique custom style for a one-off look
- Build it yourself kit
- CNC laser cut and CNC bent for precise fit
- Engineered using 3D scan files
- Made in the USA
- Includes Shock Caps
- *Requires welding

Take your off-roading adventure to the next level with Artec Industries DIY fabricated brackets. Our team designed this particular bracket to seamlessly integrate into your vehicle, with features like better access to grease fittings, and bottom protection for the joint on the lower link brackets. This bracket boasts a 2.625” mounting width with a 9/16” bolt hole, perfect for common sized cartridge joints. Plus, its ¼" thick boxed steel plate construction ensures strength and impact resistance, so you can tackle any terrain with confidence.
Notes : This kit requires general welding and fabrication skills. Welding should only be done by a competent welder. Artec Industries implies no guarantees or warranties and is not liable for improper installation.
Reviews
Install Instructions
Step 1 : Inspect and open package, Verify all contents are accounted for.
Step 2: Remove all paint, powder coat, oils from all surfaces where welding will be done so that material is left raw and ready to weld.
Step 3: Cover up any vital componets thay could be damaged from weld spatter & heat example : shocks, brake lines, hoses, wiring harnesses etc.
Step 4: Mock up links and shocks into position to ensure proper fitment some grinding may be required
Step 5: Tack weld into position
Step 6: Fully cycle suspension to ensure proper placement .
Step 7: Remove Shock and Links
Step 8: Finish welding into place
Step 9: Paint or powder coat to prevent rust this is a raw steel item .
Step 10: Take pictures, Show off how awesome your rig is now to your buddies !


Community Discussion


