


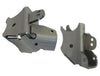
JK Rear LCA Brackets with Skids
SKU : JK4427
Regular price
$168.29
$151.46
JK Rear LCA Brackets with Skids

- 2.625" mounting width fits common sized cartridge joints and factory control arm bushings
- Integrated skid plate
- Joint protection from direct impact
- Decreases premature wear on joint
- Designed to not interfere with joint movement
- Secured to axle better than OEM so it doesn’t rip off
- 1/4" thick steel
- boxed plate for strength and impact resistance
- Shock Mounts are at factory height and do not limit your up-travel
- Provides mounting locations for you Lower Control Arms, Shocks, and Sway Bar
- Sold in a pair
Off-roading is all about adventure, but bent and mangled factory lower control arm brackets can quickly spoil the fun. Artec’s Heavy Duty Brackets provide a reliable replacement that ensures you’ll never have to worry about bracket damage again. Unlike standard factory brackets, ours are specifically designed to improve functionality, and provide mounting locations for your lower control arms, shocks, and sway bar. Enjoy the thrill of the off-road without worrying about equipment failure.
Reviews
Install Instructions
Warning:
This Part Requires Fabrication
Skills (Cutting, Grinding, Welding) If
you are not confident in your abilities Please have this product installed at a
Local Off-Road Shop .
Tools Required:
Safety Glasses, Gloves, Wrench set, Socket Set, Torque
wrench, angle finder, tape measure, Jack, Jack stands(Tall and short) , Wheel
chock, Cutting Tool(s)(Angle Grinder with cutting and flap disk , Sawzall,
Plasma cutter, Cutting torch) and Welder.
Step 1:
Take an inventory of your parts, If you are missing any
parts Please contact Artec Industries Immediately @ (855) 278-3299 M-F 8:30am-5pm MST
Step 2:
Place wheel chocks at the front wheels of the vehicle, Break loose the lug nuts on the rear wheels
(do not fully remove the rear lug nuts.
Use a Jack and lift the rear of the vehicle off of the ground. Set Jack stands on the frame in front of the
rear control arm mounts and another set of jacks stands under the rear axle
.
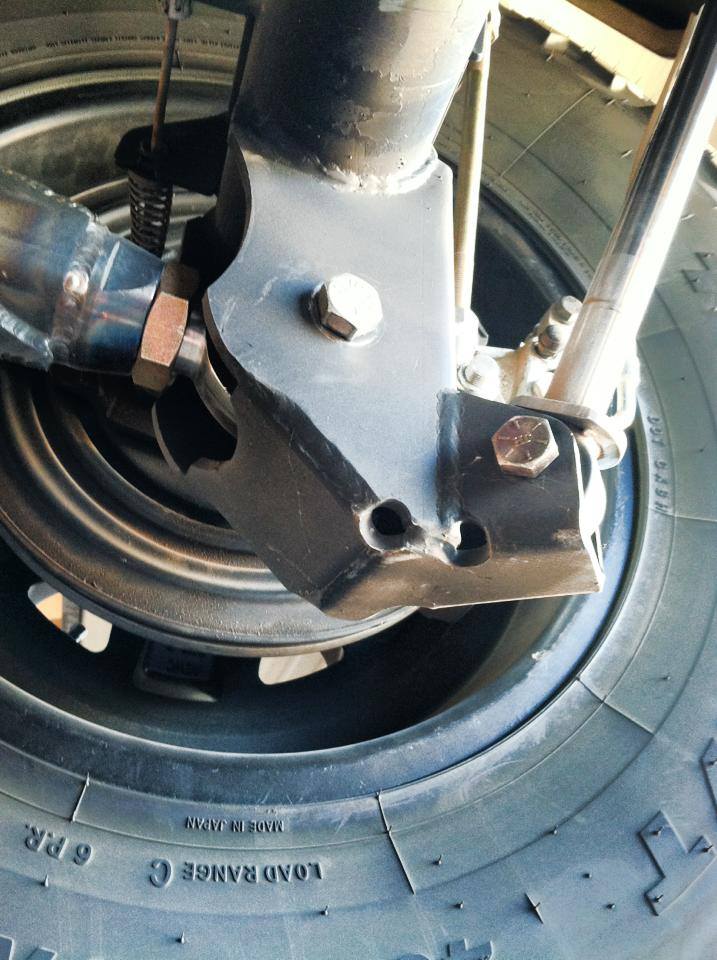
Step 3:
Remove the rear wheels from the vehicle. Now remove the rear shocks, swaybar links,
An lower control arms from the
vehicle. Once the shocks and control
arms are removed use a tape measure to measure the distance from the brake
flange on the axle to the center of the Lower arm mount. Using a magnetic angle finder measure the
angle the of the control arm mount on the back side . Record those numbers for later .
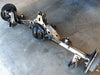
Step 4:
Cut off your lower control arm mount from the vehicle and
grind the area smooth to prep for welding.
Step 5:
Using your work station
Stand the JK4427-1 bracket on the
end so the coping for the axle is facing down there should be a small tab
facing up on the bracket. Place the
JK4427-2 on top of of the JK4427-1 The tab and square keyway should line
up. Now with them lined up tack weld
the brackets together. Now take the
JK4427-3 tab and insert it into the square keyway on the back of the
JK4427-1 the bottom of the JK4427-3
and top corner of the JK4427-2 should make contact on all 3 its and sit slightly
on top of the JK4427-2 Tack weld that
bracket into place. With all of the
brackets in place you can repeat the process on the other set of brackets then fully weld them together.
Step 6:
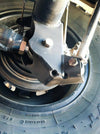
Using the measurements that you previously recorded position
the control arms mounts onto the axle and weld them into place.
(The Jk4427-1 will be the driver side
the JK4427-4 will be the passenger side.)
Step 7:
Once the brackets are welded into place you can clean them
of any machining oil from the manufacturing process and spray them with some
self-etching primer and paint.
Step 8.
Install the Lower control arms , shocks and sway bar links back on the
vehicle along with the wheels and tires.
(Do not fully
tighten the bolts yet.)
Step 9.
Using the jack raise the vehicle up off of the jack stands
remove the jack stands from under the frame and axle then lower the vehicle to the ground. Once the vehicle is on the ground you can
torque all bolts to factory specs .
After 50 miles check all bolts for tightness
and re torque if needed.

Community Discussion